Outdoor Kitchen Design Ideas & Inspiration
The outdoor kitchens that get used every week have something in common: they were designed around how the owner actually cooks and entertains. The ones that collect leaves and become expensive countertop storage? Usually designed around how they look in a photo.
I've built outdoor kitchens across Northeast Ohio for families who grill three nights a week, couples who host 30-person parties, and serious home cooks who want a wood-fired oven and a prep station that rivals their indoor setup. Every one of those projects started with the same question: how do you want to use this space? These outdoor kitchen ideas are organized by layout, cooking style, and design approach — all tested in our climate and built on the kind of patio foundation that handles Northeast Ohio's weather.
Layout Ideas
The layout determines how the kitchen functions. It's the most consequential design decision, and it's the one to get right before you pick a single appliance or finish material.
The Straight Island
Best for: Smaller patios, budget-conscious builds, homeowners who primarily grill.
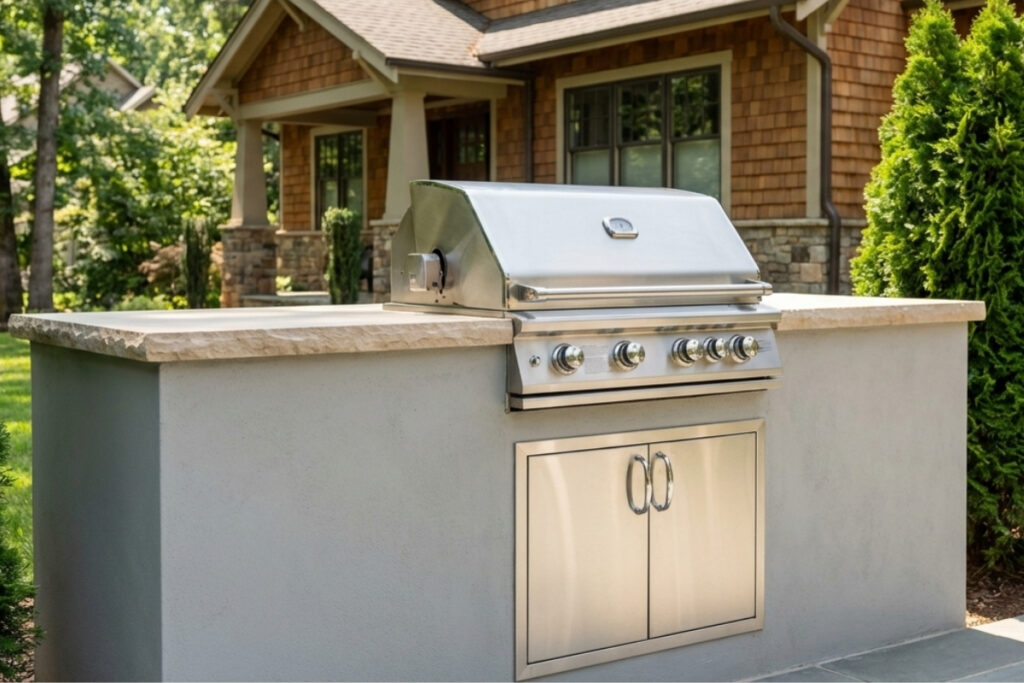
A single linear island, typically 8–12 feet long, with the grill centered and counter workspace on either side. It's the most space-efficient layout and the most affordable to build (one continuous structure, one countertop slab, minimal utility runs).
Design tip: Even on a straight island, zone your workspace. Prep surface on one side of the grill, plating and serving surface on the other. Keep raw and cooked food workflows separate, just like you would inside.
A straight island keeps the cook facing the yard and the guests, which is the social advantage of this layout — you're part of the gathering, not turned away from it.
The L-Shaped Kitchen
Best for: Larger patios, kitchens with a sink, homeowners who want defined work zones.
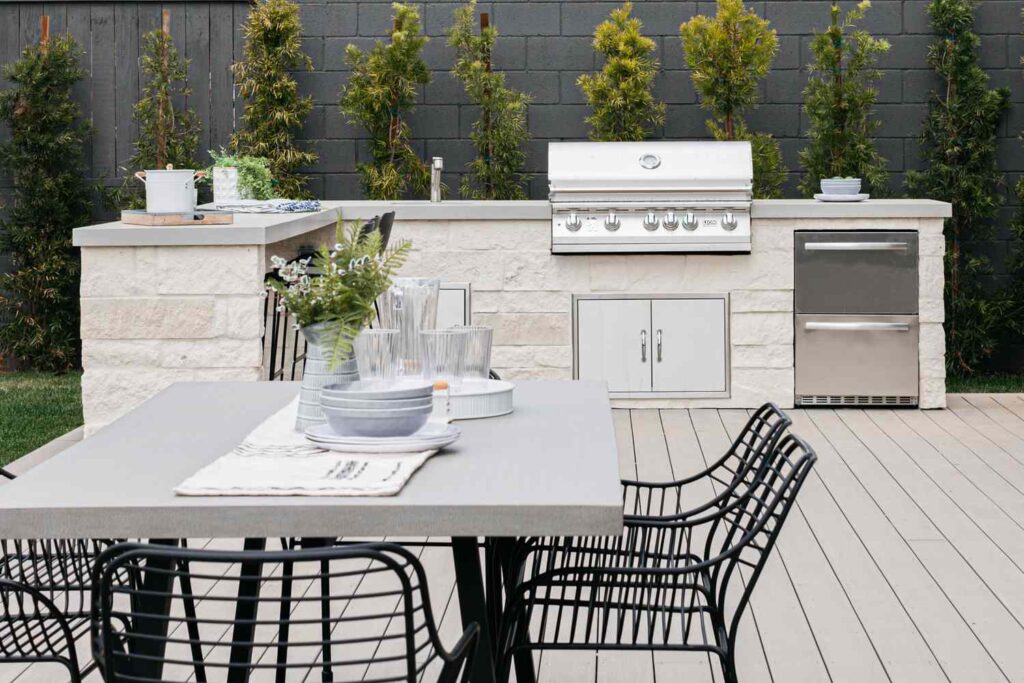
An L-shaped layout adds a perpendicular wing to the main island, creating an enclosed work zone for the cook. The grill goes on the main run. The sink, prep area, and refrigerator go on the wing. Guests sit at the bar on the outside of the L while the cook works inside the angle.
This layout introduces the "work triangle" concept from interior kitchen design — the relationship between the cooking surface, sink, and refrigerator. Keeping those three elements within a few steps of each other makes cooking efficient.
What it adds to the project: An L-shape requires a corner connection (structural and countertop), more foundation footprint, and typically longer utility runs. Budget an additional $8,000–$15,000 over a straight island for the extended structure, countertop, and finish.
The U-Shaped Kitchen
Best for: Dedicated outdoor chefs, frequent large-group entertaining, properties with space for a 12×10+ kitchen footprint.
Three sides of workspace surrounding the cook. Grill on the back wall, prep and sink on one side, serving and bar on the other. The U-shape provides the most counter space and the most appliance capacity of any layout. It also creates a distinct separation between the kitchen zone and the patio entertainment zone.
This is the layout for the homeowner who says "I want everything" — and has the patio space and budget to support it. See our outdoor kitchen service page for full details on construction and cost.
Consideration: The cook is somewhat enclosed. If you want to face the yard and be part of the party while cooking, an L-shape or straight island might suit you better. If you want a dedicated cooking space where you can focus and have everything at arm's reach, the U-shape is hard to beat.
The Two-Island Kitchen
Best for: Separating cooking from serving, creating a buffet-style flow, or splitting hot (grill) and cold (bar/refrigeration) functions.
Instead of one continuous structure, build two separate islands with a 4–5 foot walkway between them. The primary island houses the grill and cooking appliances. The secondary island is the bar — beverage center, refrigerator, ice maker, and a long countertop for serving and guest seating.
Two-island layouts work exceptionally well for entertaining because they create natural traffic flow. Guests access the bar without crowding the cook. Food comes off the grill to the bar for self-serve. It's the outdoor equivalent of a kitchen island with a separate butler's pantry.
The Galley Kitchen (Against a Wall)
Best for: Properties where the kitchen backs against the house wall or a retaining wall, maximizing patio space in front.
All appliances and counter space arranged along one wall, with a pergola or roof overhang above. The cook faces the wall, and a pass-through shelf or bar-height countertop on the front side creates a serving surface for guests on the patio.
The galley layout saves the most patio floor space — everything is against the wall, so the full patio depth remains open for dining and lounging. It also simplifies utility runs since the kitchen is close to the house (shorter gas, electrical, and plumbing distances = lower cost).
Cooking-Style Ideas
The Grillmaster's Kitchen
Starting with a high-end grill called the 42–54 inch rotisserie model, along with a sear station and side burner. Serving dishes fit neatly on the work surface. Meat and staples keep cool inside the cold zone fridge.
Over by the wall, there is a sink good for fast cleaning. Each thing links back to the grill.
When you're into grilling, think about pairing your grill with a setup that fits how you cook. These models — Lynx and DCS — are built strong enough for big gatherings, like hosting two dozen people at dinner. For serious grillers, buying the grill makes sense, then designing the rest of the space around it.
Starting here makes sense because you get one solid grill plus room to move around outside. This setup lets you cook seriously without cluttering the property. The best part? It feels complete once it's done.
The Pizza & Fire Kitchen
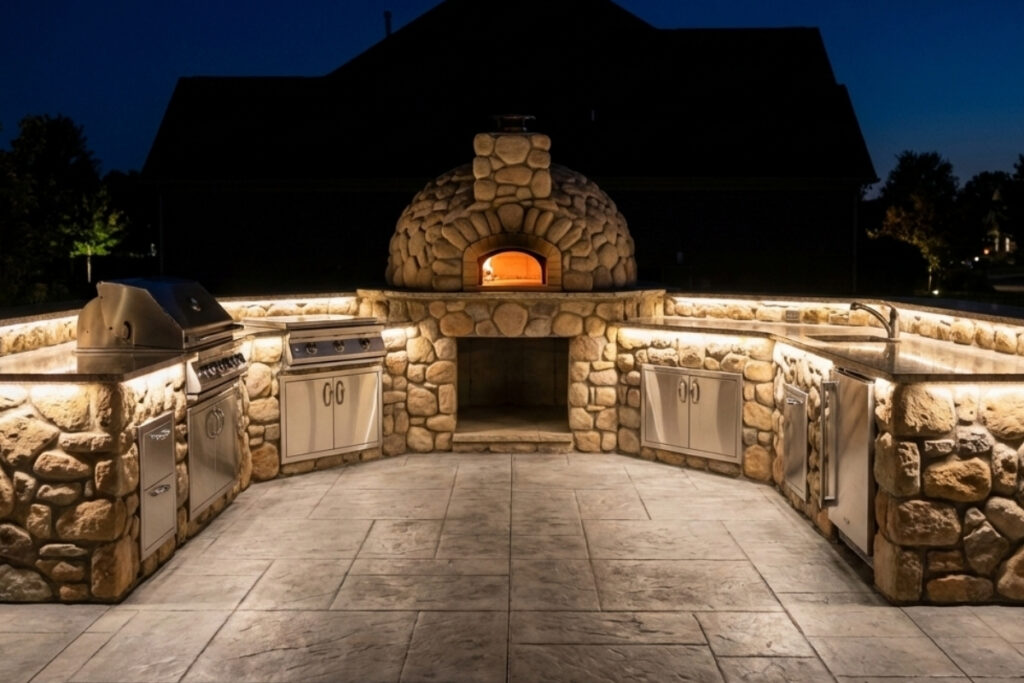
A wood-fired pizza oven takes center stage, one side marked by a working counter, the other by a compact grill or auxiliary burner. Heat climbs high here — not just for pies, but for crusty loaves, caramelized roots, birds stuffed tight, or tender cuts that simmer long. What runs things isn’t found behind a kitchen door; it’s flame, rhythm, repeat.
Above, there must be room for the chimney plus space to rise with the heat. Underneath, something solid holds down the heavy oven — those aren’t light devices, weighing around 300–600 lbs. Wood piles need their own area nearby. Often, we place the cooker at one island end, clearing the path above so smoke doesn’t reach balconies or stairs.
Flames curl up as guests gather close. Watching dough rise while heat crackles brings folks out from behind screens. This setup pulls everyone in – no corner observer here. Each visitor touches something moving: pans shift, wood sparks, meals come alive.
The Entertainer's Bar Kitchen
Prioritize the bar and social experience over the cooking. Long bar-height countertop (12–16 feet), seating for 6–8 guests, built-in beverage center, ice maker, kegerator, and a smaller grill (32–36 inch) for the food component.
The bar kitchen is for the homeowner who entertains frequently and sees the outdoor kitchen as a social hub — not primarily a cooking station. Drinks are the main event, food is the supporting act.
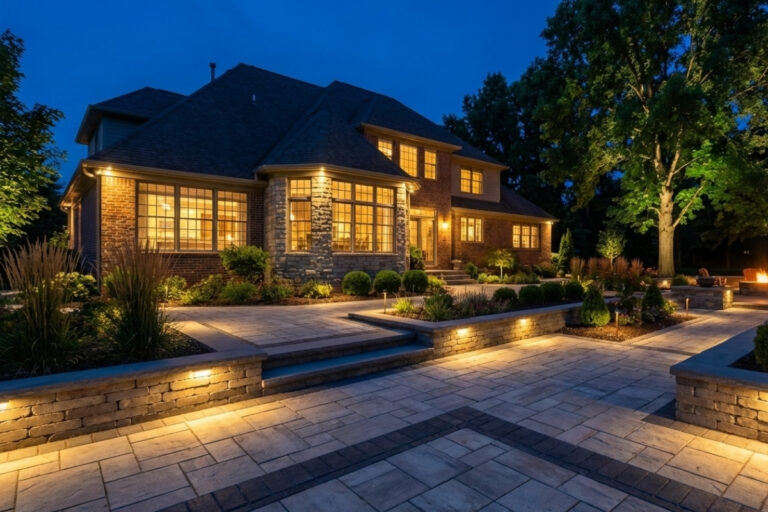
Design detail that matters: Under-counter LED lighting along the bar face, directed downward, creates ambiance at night without glare. Paired with landscape lighting on the surrounding patio, the effect is warm and inviting. See our outdoor lighting services.
The Complete Chef's Kitchen
Full setup: grill, side burner, pizza oven, smoker, sink, fridge, warming drawer, ice maker, lots of counter room. Overhead cover – pergola or pavilion – keeps things shielded from weather. Built for real cooking, outside just as strong as inside. For someone who actually uses their space, this matches or beats what's in the house.
From $60,000 to $120,000+ it depends on what appliances you pick along with the material used for finishes. Check See our outdoor kitchen cost breakdown if you need breakdowns of costs for each piece. Underneath, below the patio area, pricing for that base layer sits in patio cost guide, handled apart.
Material and Finish Ideas
Stacked Stone Veneer with Granite Cap
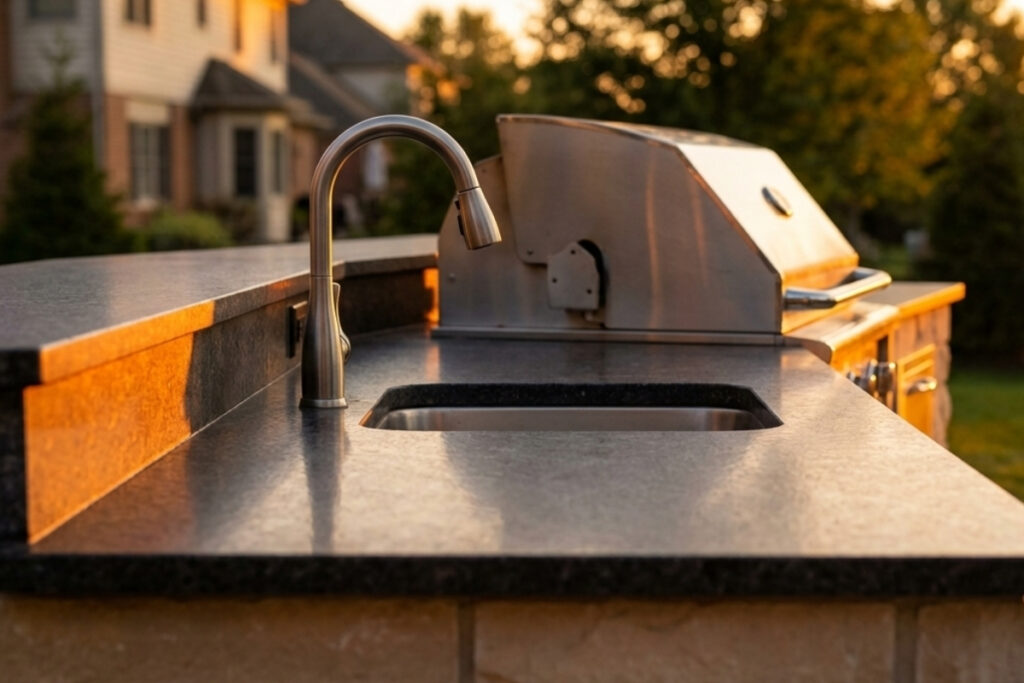
The most popular combination in our project mix. Stacked stone (manufactured or natural) on the island faces with a polished or leathered granite countertop. The stone provides texture and warmth. The granite provides a durable, functional work surface. Together, they complement virtually any home style and surrounding hardscape.
Modern Stucco with Porcelain Countertop
Clean lines, neutral colors, zero texture. Smooth stucco finish in gray or white, paired with a large-format porcelain slab countertop. This combination suits contemporary and mid-century homes, and it pairs well with large-format paver patios.
Stucco is the least expensive finish option and the most maintenance-demanding (repainting every 5–8 years). But for the right aesthetic, the clean look is worth it.
Brick Island with Bluestone Countertop
A classic combination for Colonial, Federal, and traditional homes. Brick matches the home's existing masonry. Bluestone provides a natural, cool-toned countertop that's heat-resistant and beautiful.
This pairing works particularly well in older neighborhoods — Shaker Heights, Chagrin Falls, Rocky River — where the outdoor kitchen should feel like it's always been part of the property. (See more material pairings in our hardscaping cost guide.)
Full Natural Stone (Veneer and Countertop)
For the premium build: real thin-cut stone veneer (not manufactured) with a natural quartzite or granite countertop. The island becomes a piece of stonework rather than a structure with stone glued to it. The material investment is significant, but the visual result is unmatched.
Integration Ideas
Kitchen with Adjacent Fire Feature
Place a fire pit or fire table just beyond 6–10 feet from the kitchen door – close by so the outdoor space feels connected, yet keep enough space so heat from the back doesn’t fight with warmth up front. People flow easily from counter or bar area out toward the flames. Moments unfold without forcing them: first chat with drinks in hand near prep spot, then settle under lights by the dining setup, later gather softly beside burning logs.
One supply line may serve both the grill and a gas fire element, making installation easier.
Kitchen Under a Pergola with Fan and Lighting
Under its hood, a pergola hosts a ceiling fan tied to a built-in lighting system, turning the space into real territory – instead of tools stacked beside the property. Over the sizzling grill, circulation matters, so the rotating blades push warmth away; above, glass covers the surface from sun streaks, while soft glow after dusk adds warmth and control.
When skies shift like Northeast Ohio’s, cover matters most. A pergola with moveable louvers handles changes well. During bright nights, let it open wide. Rainy days? Keep them shut tight. Afternoon light – partial stance works just right.
Kitchen with Outdoor Dining Integrated
Instead of separating things, shape how they flow together. A counter from the kitchen slips outward, forming a built-in place to set items down. From that spot, it's only 3–5 feet steps away to the table where people eat.
Food sits close by when a window in the wall opens up space right beside the counter.
Good outdoor kitchens work like real restaurant setups – getting from grill to seat happens naturally, without long detours.
Northeast Ohio–Specific Considerations
Winterization Access
Every design decision should account for winter. Can you reach the plumbing shut-offs without moving the grill? Are the drain points accessible? Can you cover or enclose the appliances without a complicated procedure every November?
We install access panels, clearly labeled shut-off valves, and quick-disconnect fittings on every kitchen we build. Winterization should take 30 minutes, not a weekend.
Wind Orientation
Cleveland's prevailing winds come from the southwest. Orient the grill so smoke blows away from the seating area and the house. If site constraints don't allow ideal orientation, a partial windscreen wall (3–4 feet tall, stone or masonry, on the windward side of the grill) manages smoke effectively.
Material Durability
Skip anything that isn't rated for freeze-thaw in a humid continental climate. That means no engineered quartz countertops (the resin binders degrade), no thin porcelain tile on horizontal surfaces (use 20mm porcelain pavers instead), and no wood-frame islands without proper weather protection.
What works: granite, quartzite, porcelain slab, properly sealed concrete, CMU block structure, 304-grade stainless steel appliances, and manufactured or natural stone veneer installed with proper drainage behind. The ICPI publishes best practices for hardscape base construction that apply to outdoor kitchen foundations as well.
Getting From Ideas to Builds
These ideas are a starting point. The real design work happens when we walk your property, evaluate the site conditions, talk through how you cook and entertain, and translate all of that into a plan that works — structurally, aesthetically, and within your budget.
The homeowners who are happiest with their outdoor kitchens are the ones who spent time in the design phase. The ones who rushed to construction without resolving layout, appliance selection, and utility planning are the ones who wish they'd done it differently.
Request your design consultation — bring your inspiration photos, your cooking wish list, and your questions. We'll handle the engineering, the construction, and everything in between.
Bee Green Outdoor Living designs and builds custom outdoor kitchens across Greater Cleveland, Medina County, and Lorain County. From patio installation to full outdoor living builds, we handle every element under one roof.